
Here is a more complete guide to making a stop-motion video, via iPhoto and iMovie. Also, disregard that deadline I randomly set. You can still make a movie and turn it in. Also, most of these pics are thumbnails, so click to enlarge.
Step 1: Take your camera out of your bag. Set your resolution to the lowest your camera will go. Take many, many, many pictures.
Step 2: Upload photos into their own album on iPhoto.

Step 3: Make a new project in iMovie. Name it whatever you want your video to be called. Some questions to ask yourself when composing a name are, "Does this name make sense?" "Does this name have anything to do with the movie?" and "Will this name convey the impression I was on Acid when I wrote it?"

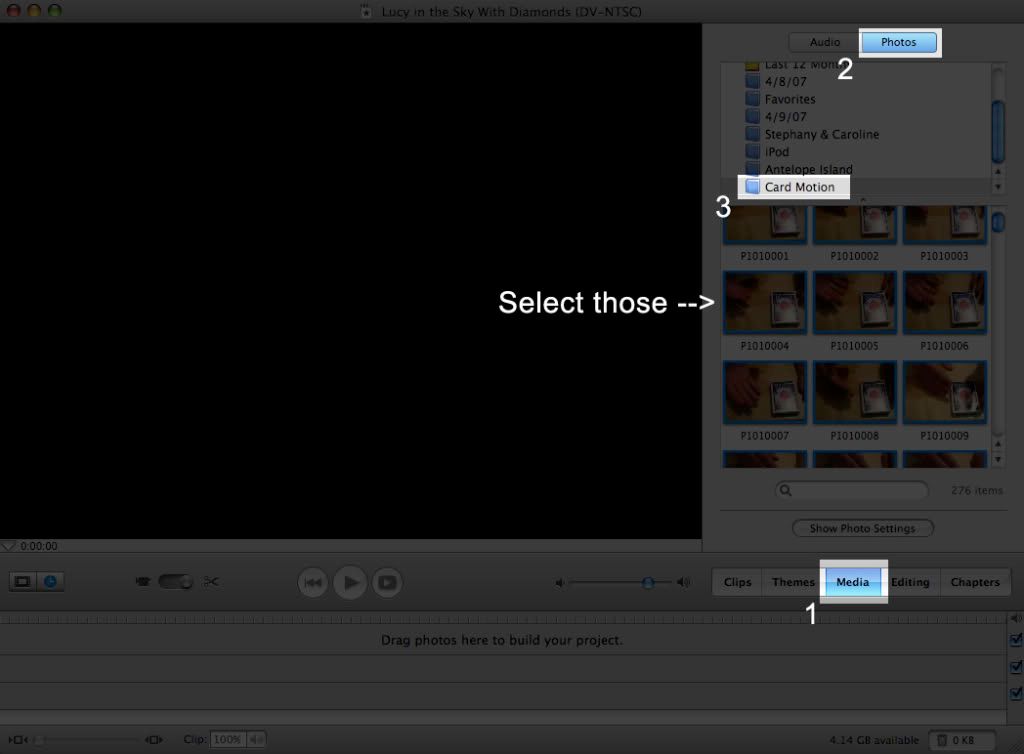
Step 4: Go to the "Media" tab, and make sure it's displaying Photos instead of Music. Select your album.
Step 5: Highlight all the photos in your album. The easiest way to accomplish this is to click the first one, then scroll down to the last one and shift-click it, but some people prefer the archaic method of clicking every single one. Apparently it affords a greater sense of satisfaction after you've worn out your mouse clicking 362 separate pictures. Once you have them highlighted, go to the little box that popped up when you selected one. Set the top to 1:00. This will turn off the Ken Burns effect (slow zooming in and panning). The bottom slider should go ALL THE WAY DOWN. The number should be 0:03. This means 0 seconds and 3 frames.
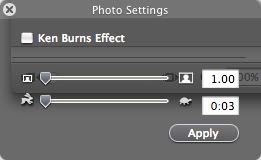
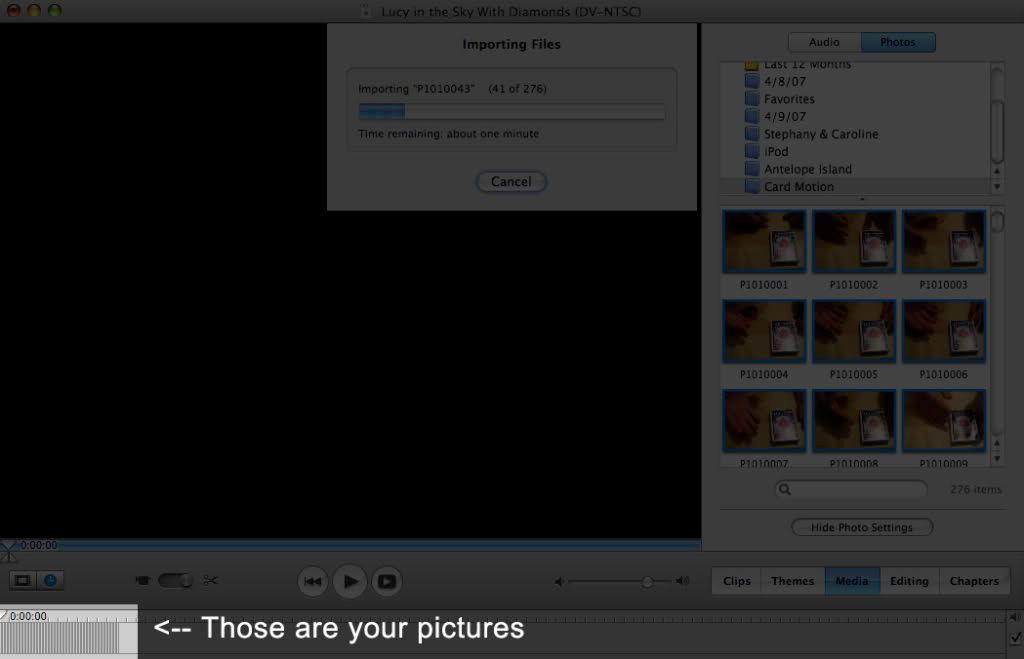
Step 6: Press Apply. This will put all the pictures in the album into the timeline, pre-formatted to 3 frames each. Then again, if all those college relaxation hours are driving you crazy, you could spend a little extra time (possibly less than a fortnight) dragging every single photo down to size by hand.
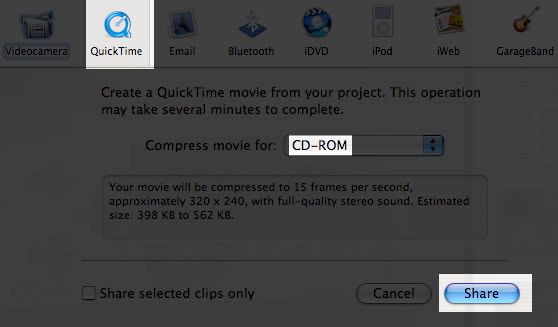
Step 7: File>Export to QuickTime. Compress for CD-ROM. Upload to YouTube. Comment a link. Congratulations!
Optional: If you want to add music to your movie, go back to the Media tab, but this time make sure "Music" is selected. Pick a movie from iTunes and drag it below the video timeline (there are 3 timelines - 1 video and 2 audio). If you don't want your video to be 30 seconds of movie + the rest of the song playing to a very interesting black screen, click on the big purple thing in the timeline (it will get a little darker when you select it), drag the little pointer just above the video timeline to the end of the video, and press Cmd+T. This will separate your audio. Then select the audio you don't need and delete it.
Thank you for your help. I realized that my main problem was the "Ken Burns" effect. It took me a while to figure out how to fix that, but after much agonizing, I feel accomplished. Thanks for this new love in my life.
ReplyDeletethank you very much for this:)
ReplyDeletejust made my first stop-motion,and you helped me a lot.
love from Norway